Environments and Variables
Variables let you swap out values in your requests — URLs, API keys, tokens, IDs — without editing each request manually. The classic use case: a baseUrl variable set to https://dev.api.example.com in your Development environment and https://api.example.com in your Production environment. Switching between them updates every request at once.
Creating an Environment
- Click the Environments icon in the sidebar rail, or press
Cmd/Ctrl E. - In the left panel, type a name for your environment (e.g.
Development) and click +. - The new environment opens on the right, ready to add variables.
Adding Variables
- With an environment selected, click + Add Variable.
- Enter the Key — the name you will use in
{{...}}syntax. - Enter the Value — the actual value to substitute.
- Use the checkbox on each row to enable or disable a variable without deleting it.
Example — Development environment:
baseUrl    = https://dev.api.example.com
apiKey     = dev-key-abc123
userId     = 42
timeout    = 5000
Using Variables in Requests
Wrap the variable name in double curly braces anywhere in a request — URL, header value, body, query parameter, or auth field:
URL:     https://{{baseUrl}}/api/v1/users/{{userId}}
Header:  Authorization: Bearer {{apiToken}}
Body:    { "source": "{{environment}}", "timeout": {{timeout}} }
Curlex substitutes the values from the active environment before sending.
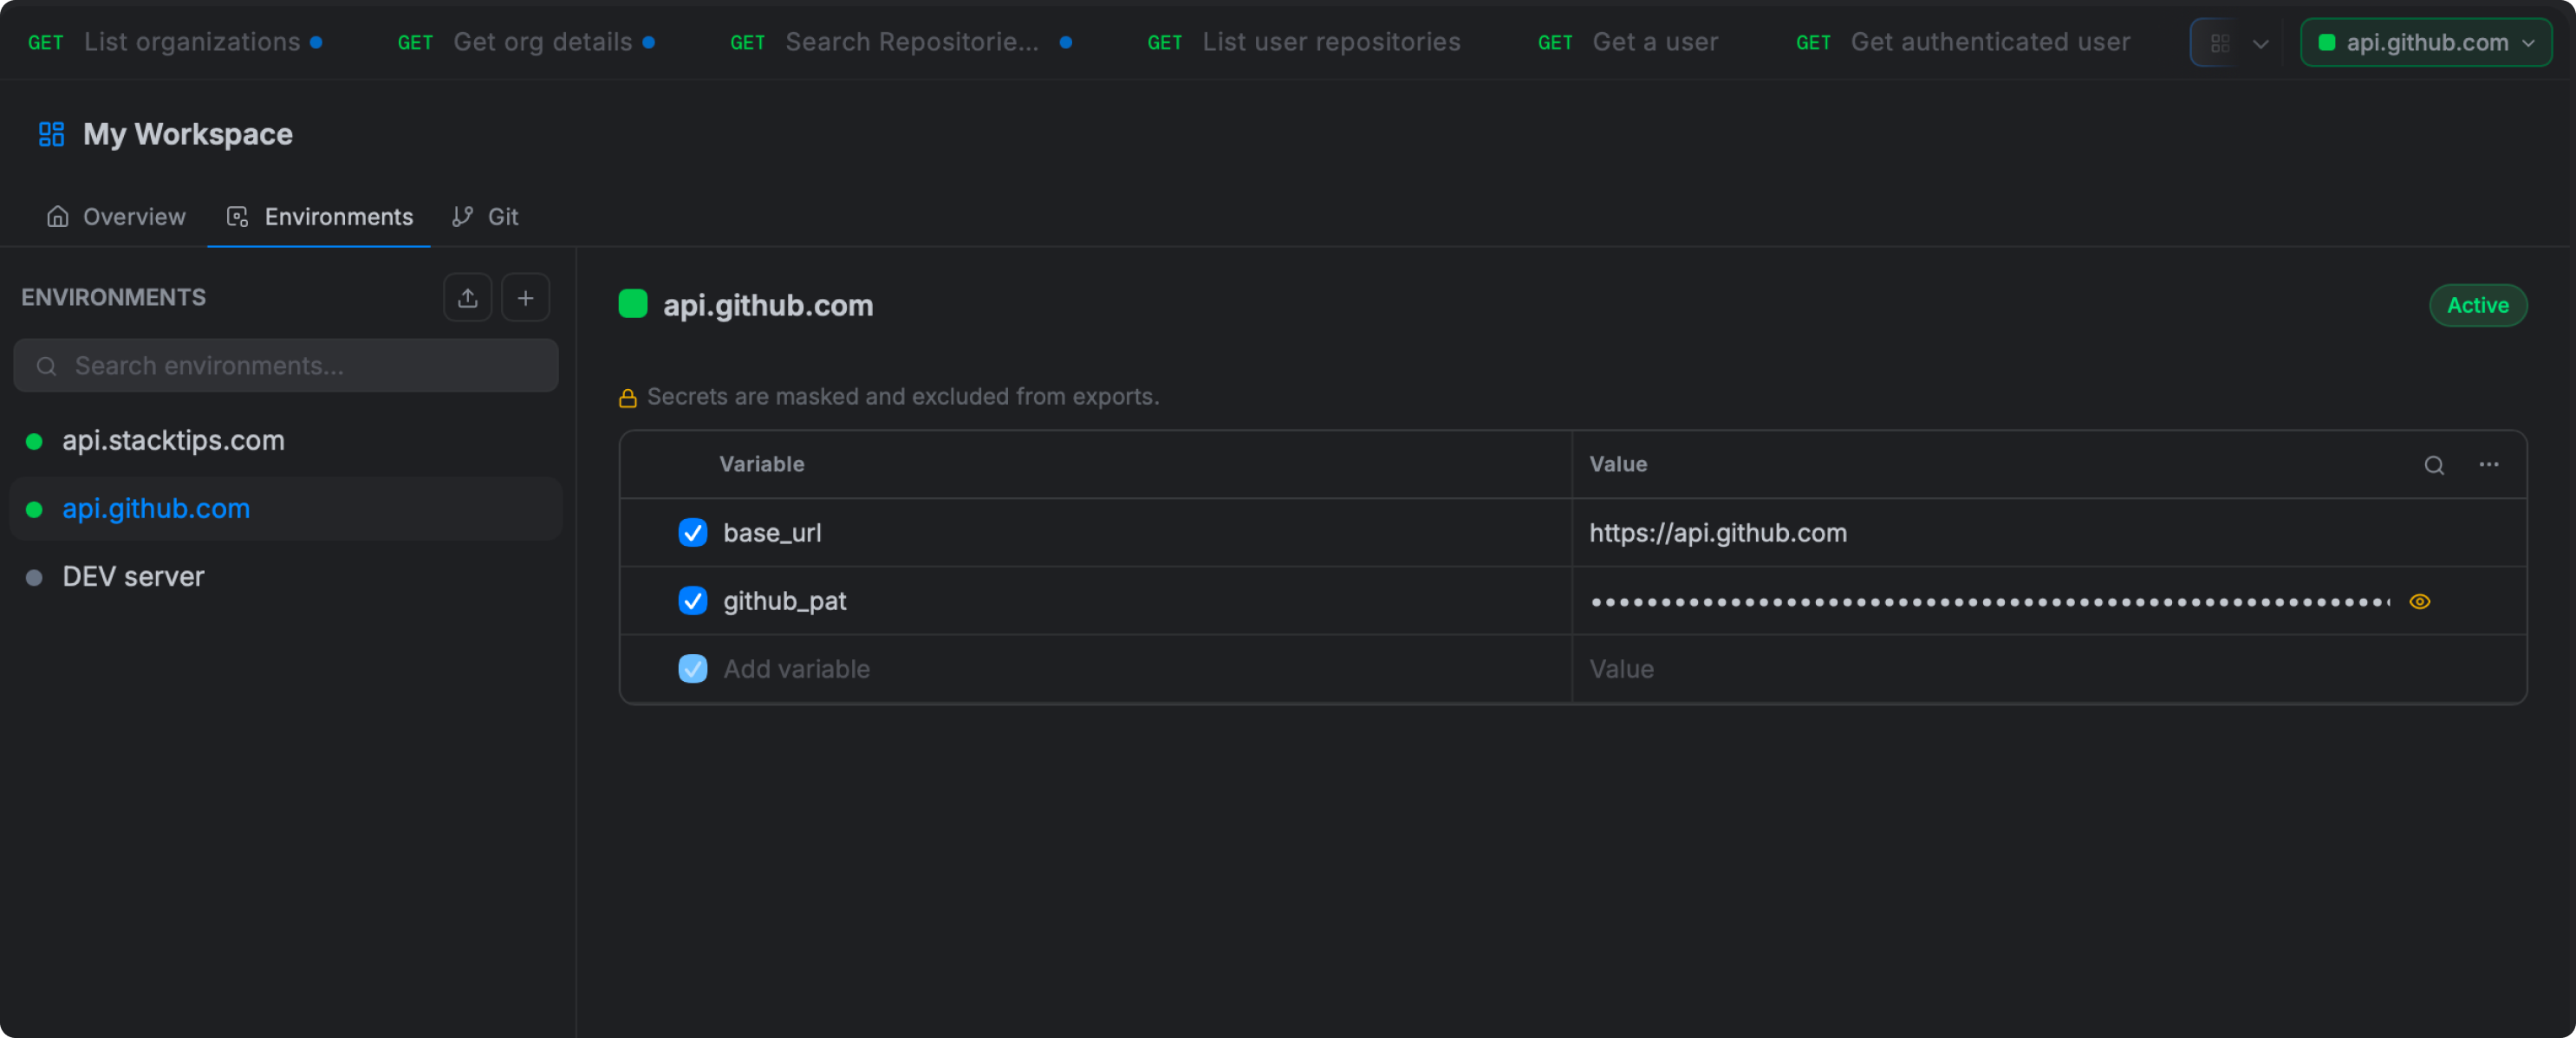
Secret Variables
Mark a variable as Secret to protect sensitive values like passwords, API keys, and tokens:
- The value is hidden in the UI as dots after saving — it cannot be read back from the interface.
- The value is redacted from the Console and exported reports — safe to share screenshots or test reports without leaking credentials.
- The value still works correctly in your requests — only the display is masked.
To mark a variable as secret, click the type indicator (the icon in the variable row) and select Secret.
Activating an Environment
Click the environment badge in the top-right corner of the main content area to switch. All open request tabs immediately start using the new variable set. The active environment name is also shown in the status bar at the bottom of the window.
Only one environment can be active at a time per workspace.
How Variables Are Resolved
When Curlex encounters {{variableName}}, it searches these scopes in order — the first match wins:
| Priority | Scope | Set by |
|---|---|---|
| 1 — highest | Local variables | Pre-request script for this specific request |
| 2 | Data file values | Current row from a CSV/JSON file in the Collection Runner |
| 3 | Environment variables | The active environment |
| 4 | Collection variables | The collection the request belongs to |
| 5 | Global variables | Scripts using fc.globals.set() |
| 6 — lowest | Dynamic built-in variables | Built-in generators like {{$guid}}, {{$timestamp}} |
Data file values override your environment during a test run. Your environment overrides collection defaults. If nothing matches, the placeholder is left as-is in the request.
Collection Variables
Collection variables are scoped to a single collection — they travel with the collection when you export or share it. Use them for values that are specific to one API and should not vary across environments.
Set them by clicking the collection name → Variables tab → + Add Variable.
Global Variables
Global variables are available across every collection and every environment in the active workspace. Set and read them from scripts:
fc.globals.set("sharedToken", "abc123");
var token = fc.globals.get("sharedToken");
Global variables persist for the lifetime of the workspace session.
Importing and Exporting Environments
Export: Open Environments, right-click an environment, and choose Export. The file contains all variable keys and non-secret values (secret values are blanked).
Import: Click Import in the header bar and select a previously exported environment file. Postman environment exports are also supported.